
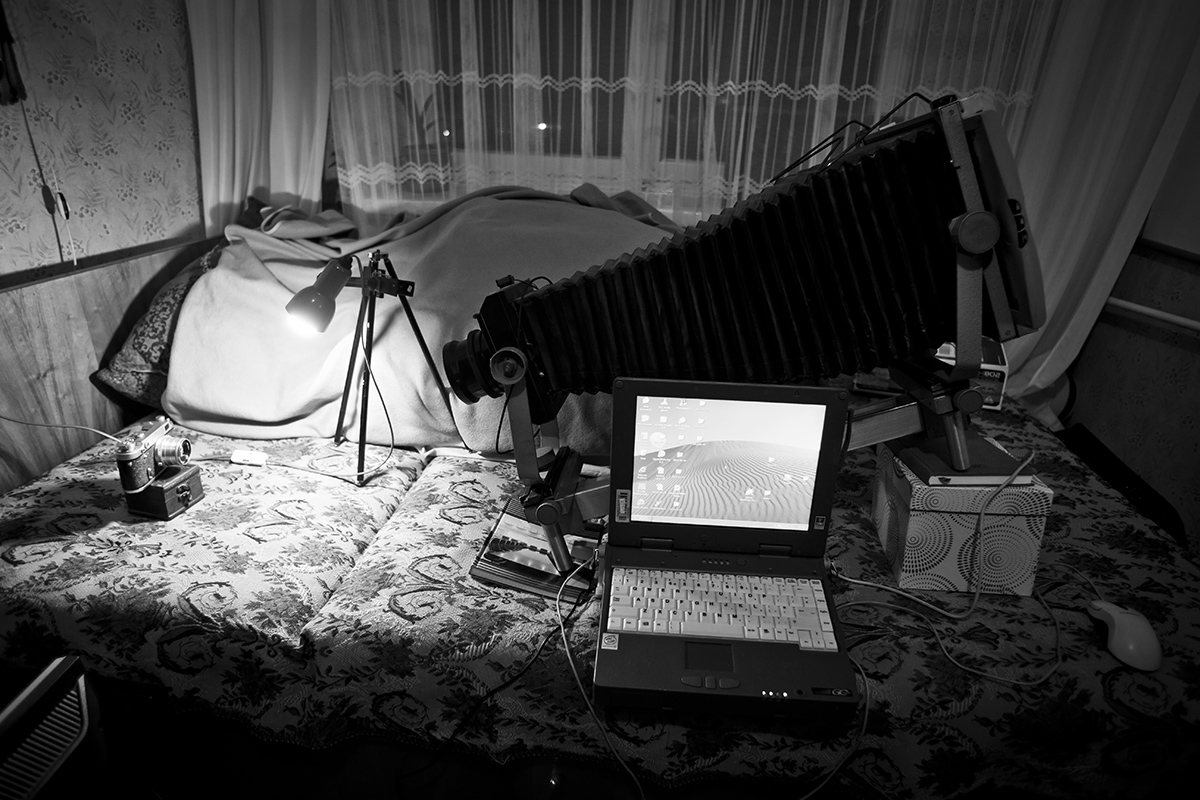
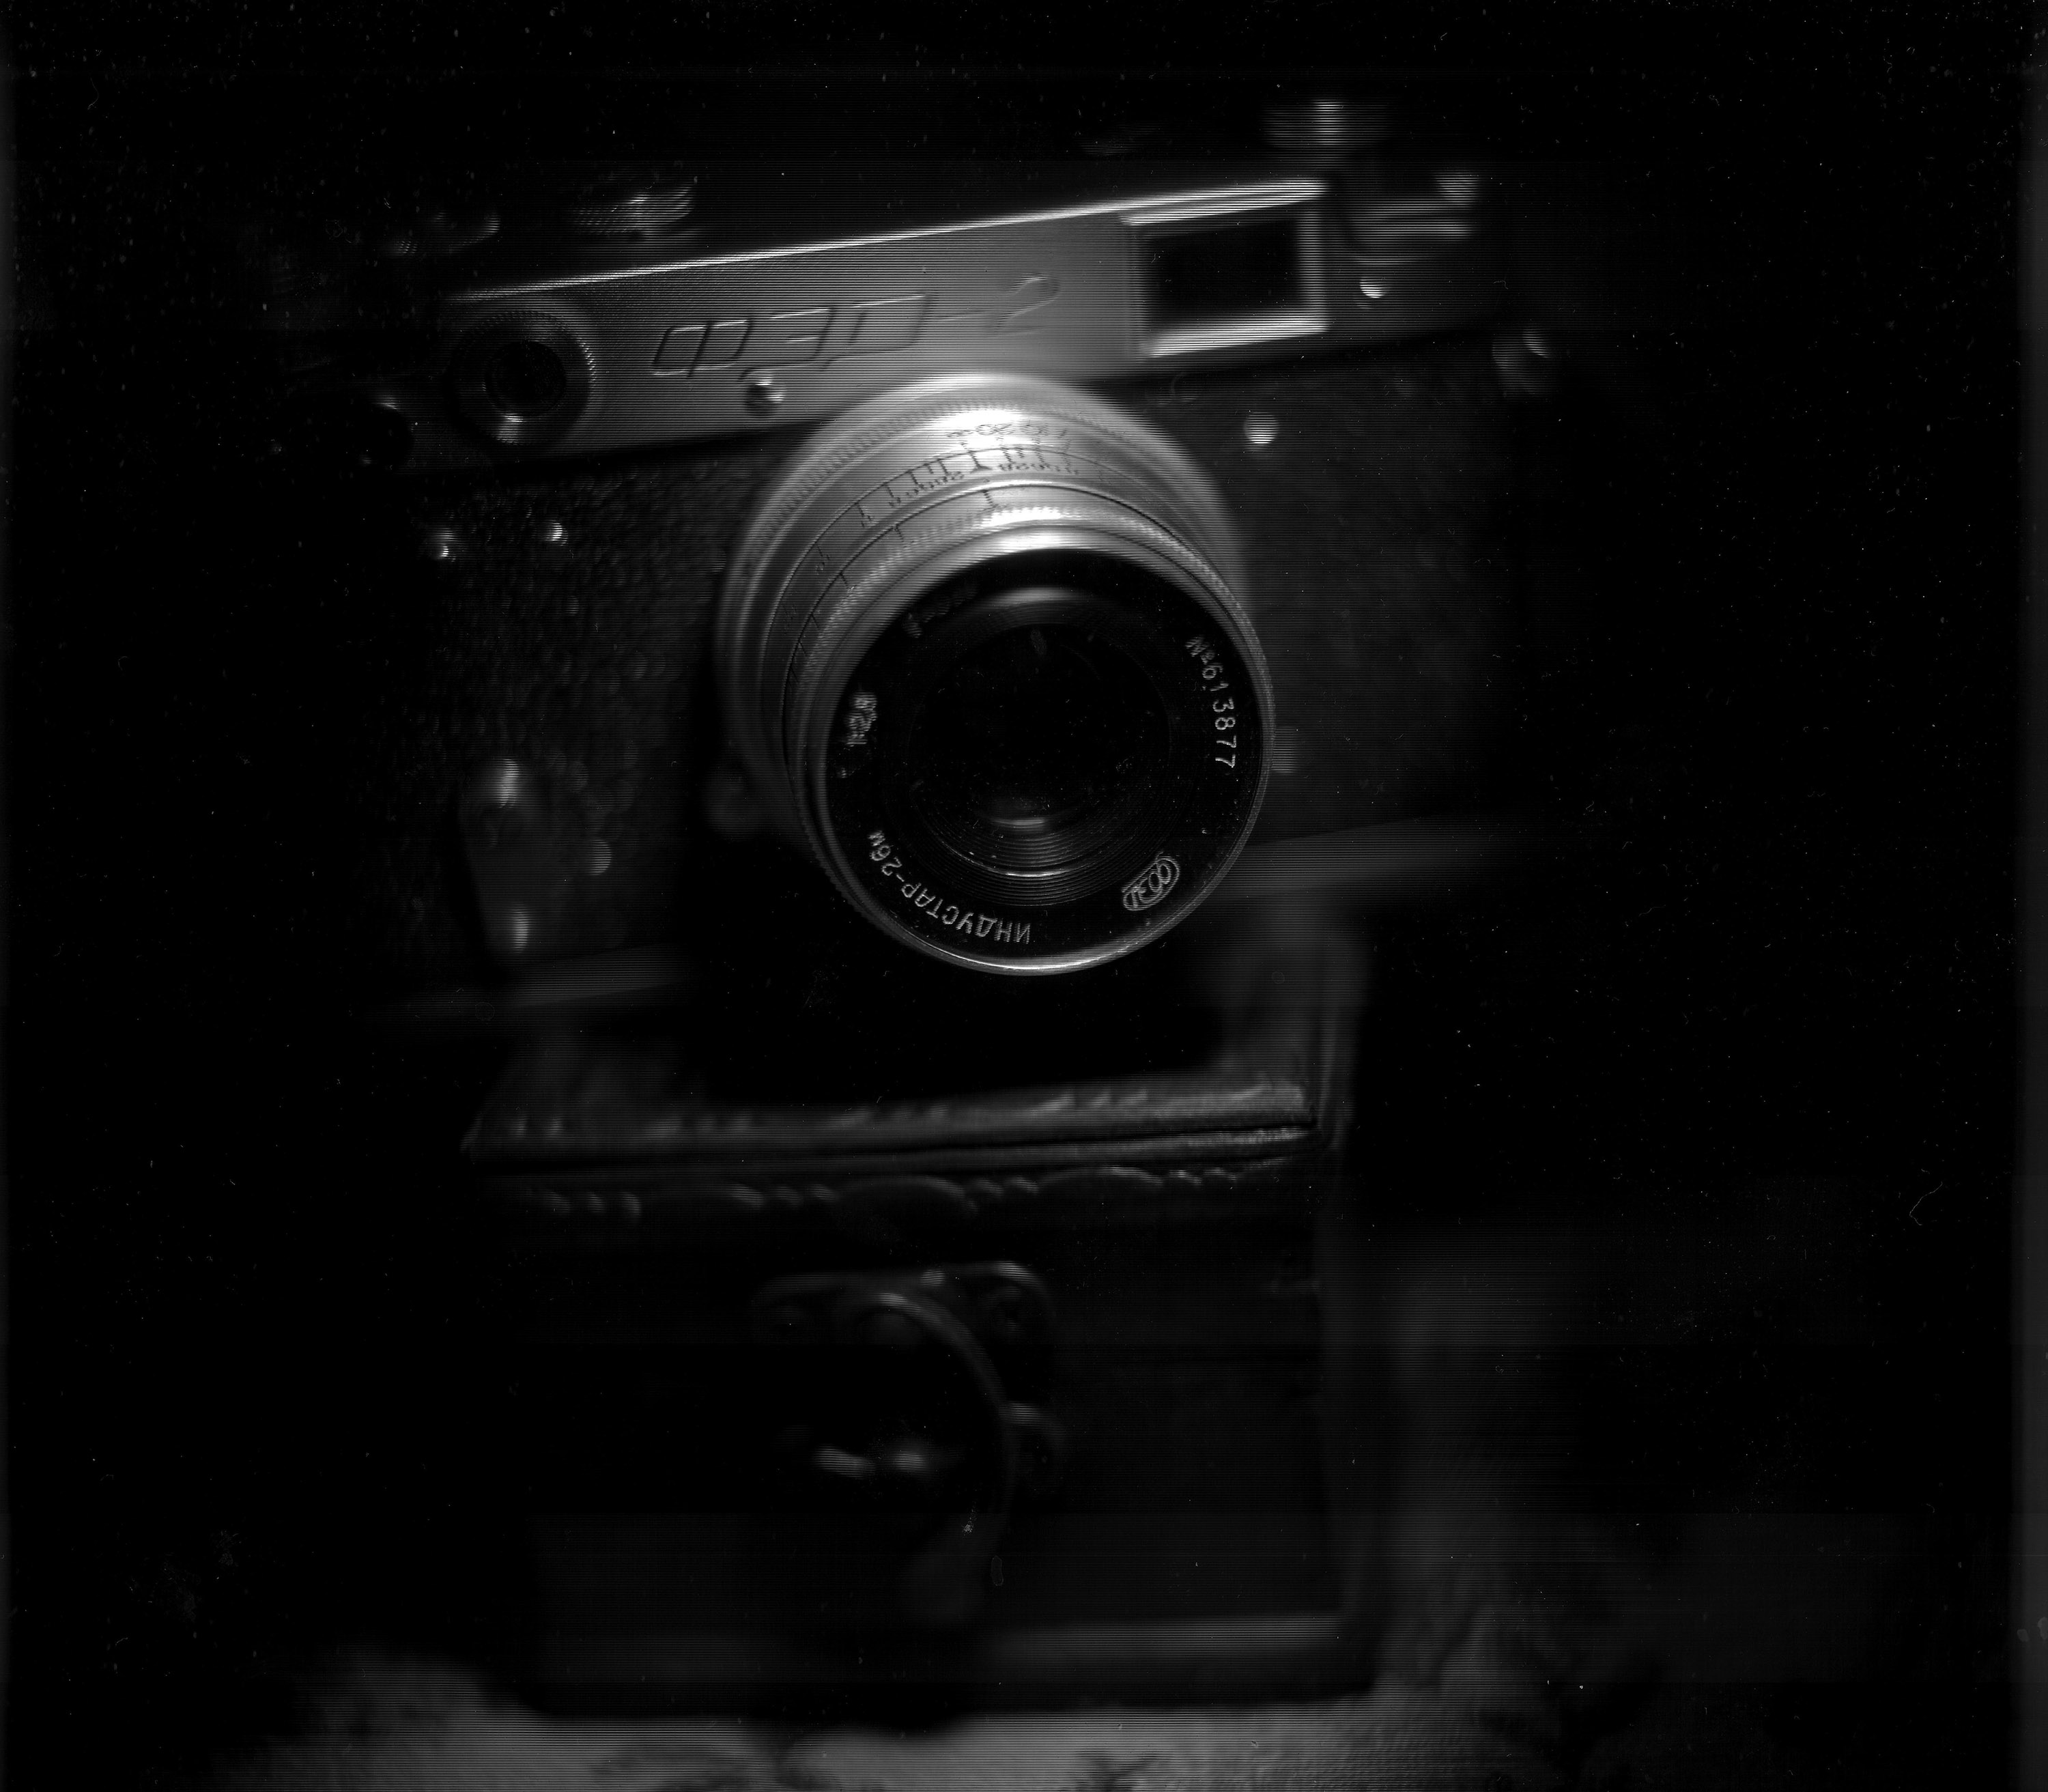
I would like to present the following article to those who think that digital large format photography is extremely expensive and unattainable for the average person. CHAPTERS: 1. HAND SCANNER 2. "SCANNEROGRAPHY" AND LARGE FORMAT CAMERAS 4. EXPOSURE TIME 4. DYNAMIC RANGE 5. BLACK AND WHITE PHOTOGRAPHY Large-format photography was attracting me for a long time and working with large lenses that give me possibilities unreachable for even the most expensive cameras of classic size. About 12 years ago in my head appeard a simple idea - scanners are catching the light reflected from a sheet of paper, but after all, light is light - you can get it from another source. It turned out to be possible and it gave very interesting effects - I called this technique "Scannerography". Of course, I am aware that there are professional systems for large format cameras that allow you to use their size, but they serve a bit different things, they are very expensive and it's hard to get a scanner of sufficient size for my needs. In the photo below, you can see the Mentor Panorama camera with the Tessar 300mm F4.5 lens with attached Canon's scanner while taking pictures of the FED 2. It was one of the first test shots, just a pre-reworked flatbed scanner.
 And effect of the photo - as you can see, a large part of the photo is black with a huge vignetting. As I later learned by undressing scanner, it turns out that there is a special filter in front of photosensitive sensor allowing the light at an angle close to 90 degrees to the matrix. If the angle was only slightly larger, the filter cut off the light. If the angle was only slightly larger, the filter cut off the light. Probably for scanning documents is a very good solution, but not for my needs. What is worse,the effect is stronger if photographed subject is further, so when lens is closer to the matrix, light begins to fall at a higher angle, inreasing the problem.
After attempts with table scanners, I switched to hand-held ones - prosaically because the classic scanners were able to scan horizontally - the mechanism wasn't designed to scan vertically, which I cared most. I have also tested newer designs - unfortunately their additional error checking systems make it impossible to modify the scanner needed for Scannerography.
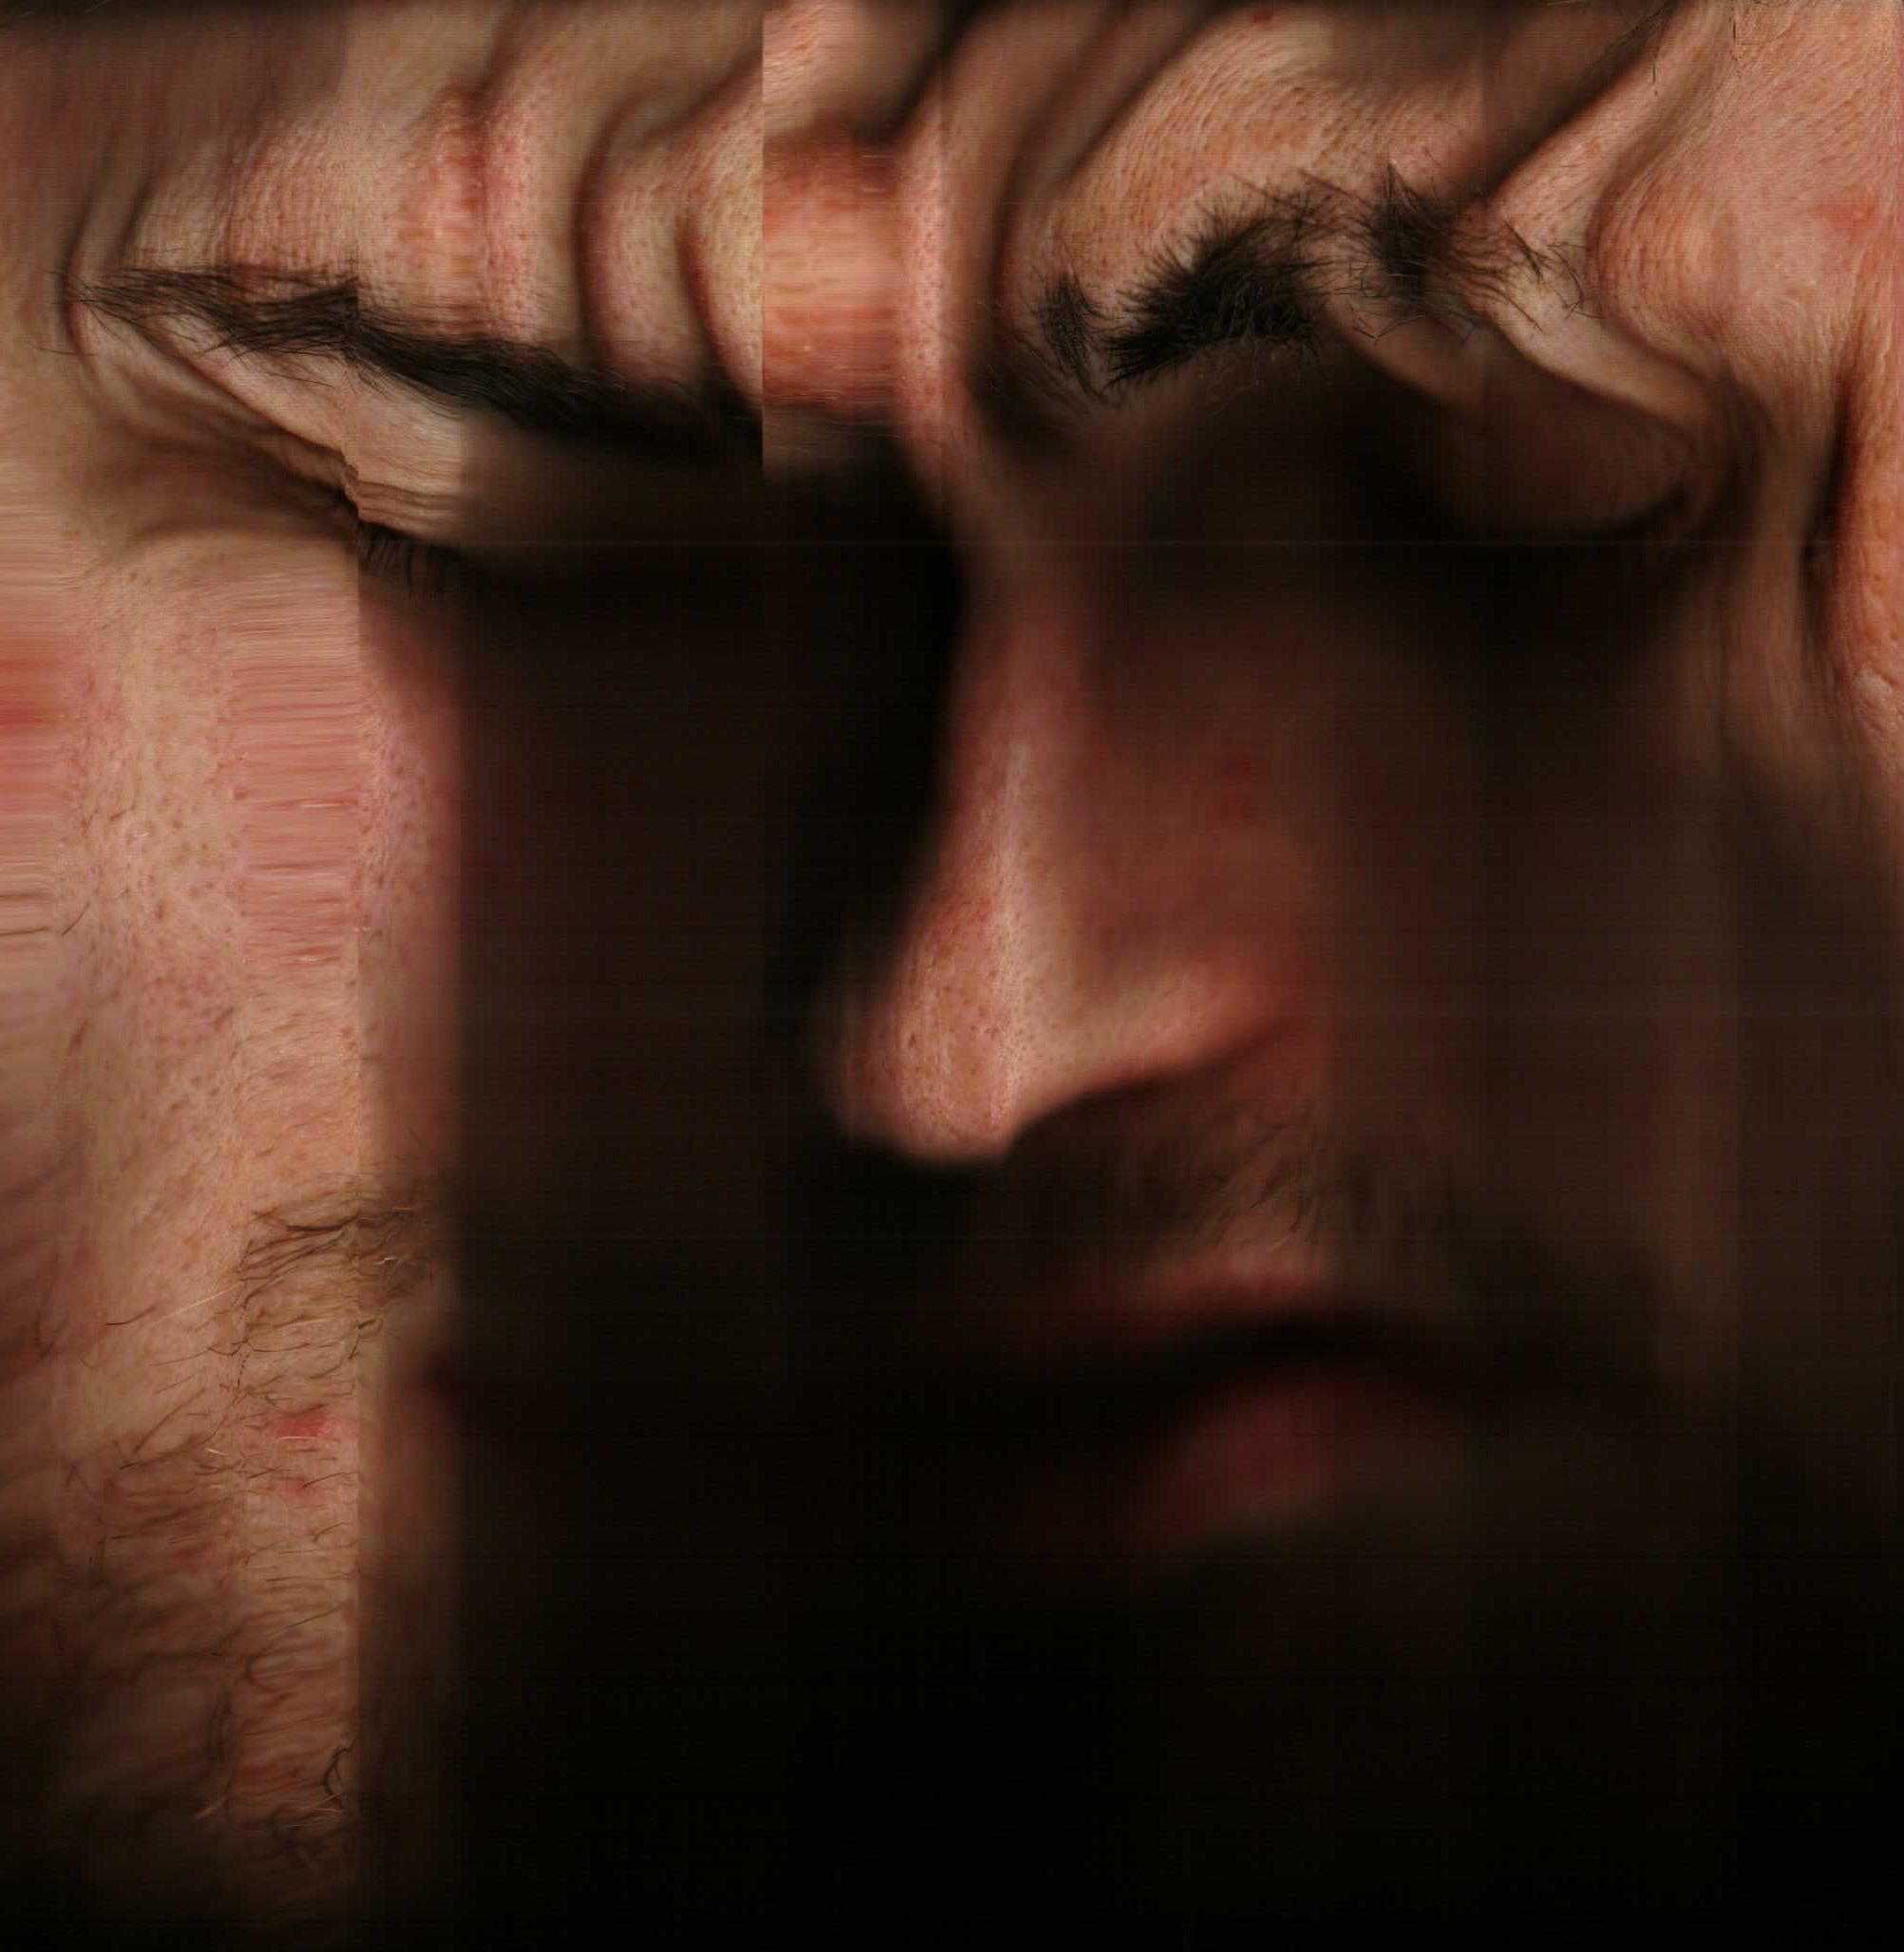
Photo below is made with a hand scanner without modifying it in any way giving an interesting effect right out of the box. It is a photograph from the border of the Scannography, where people put objects or parts of their body (still connected with its rest ;) ) on the scanner glass.
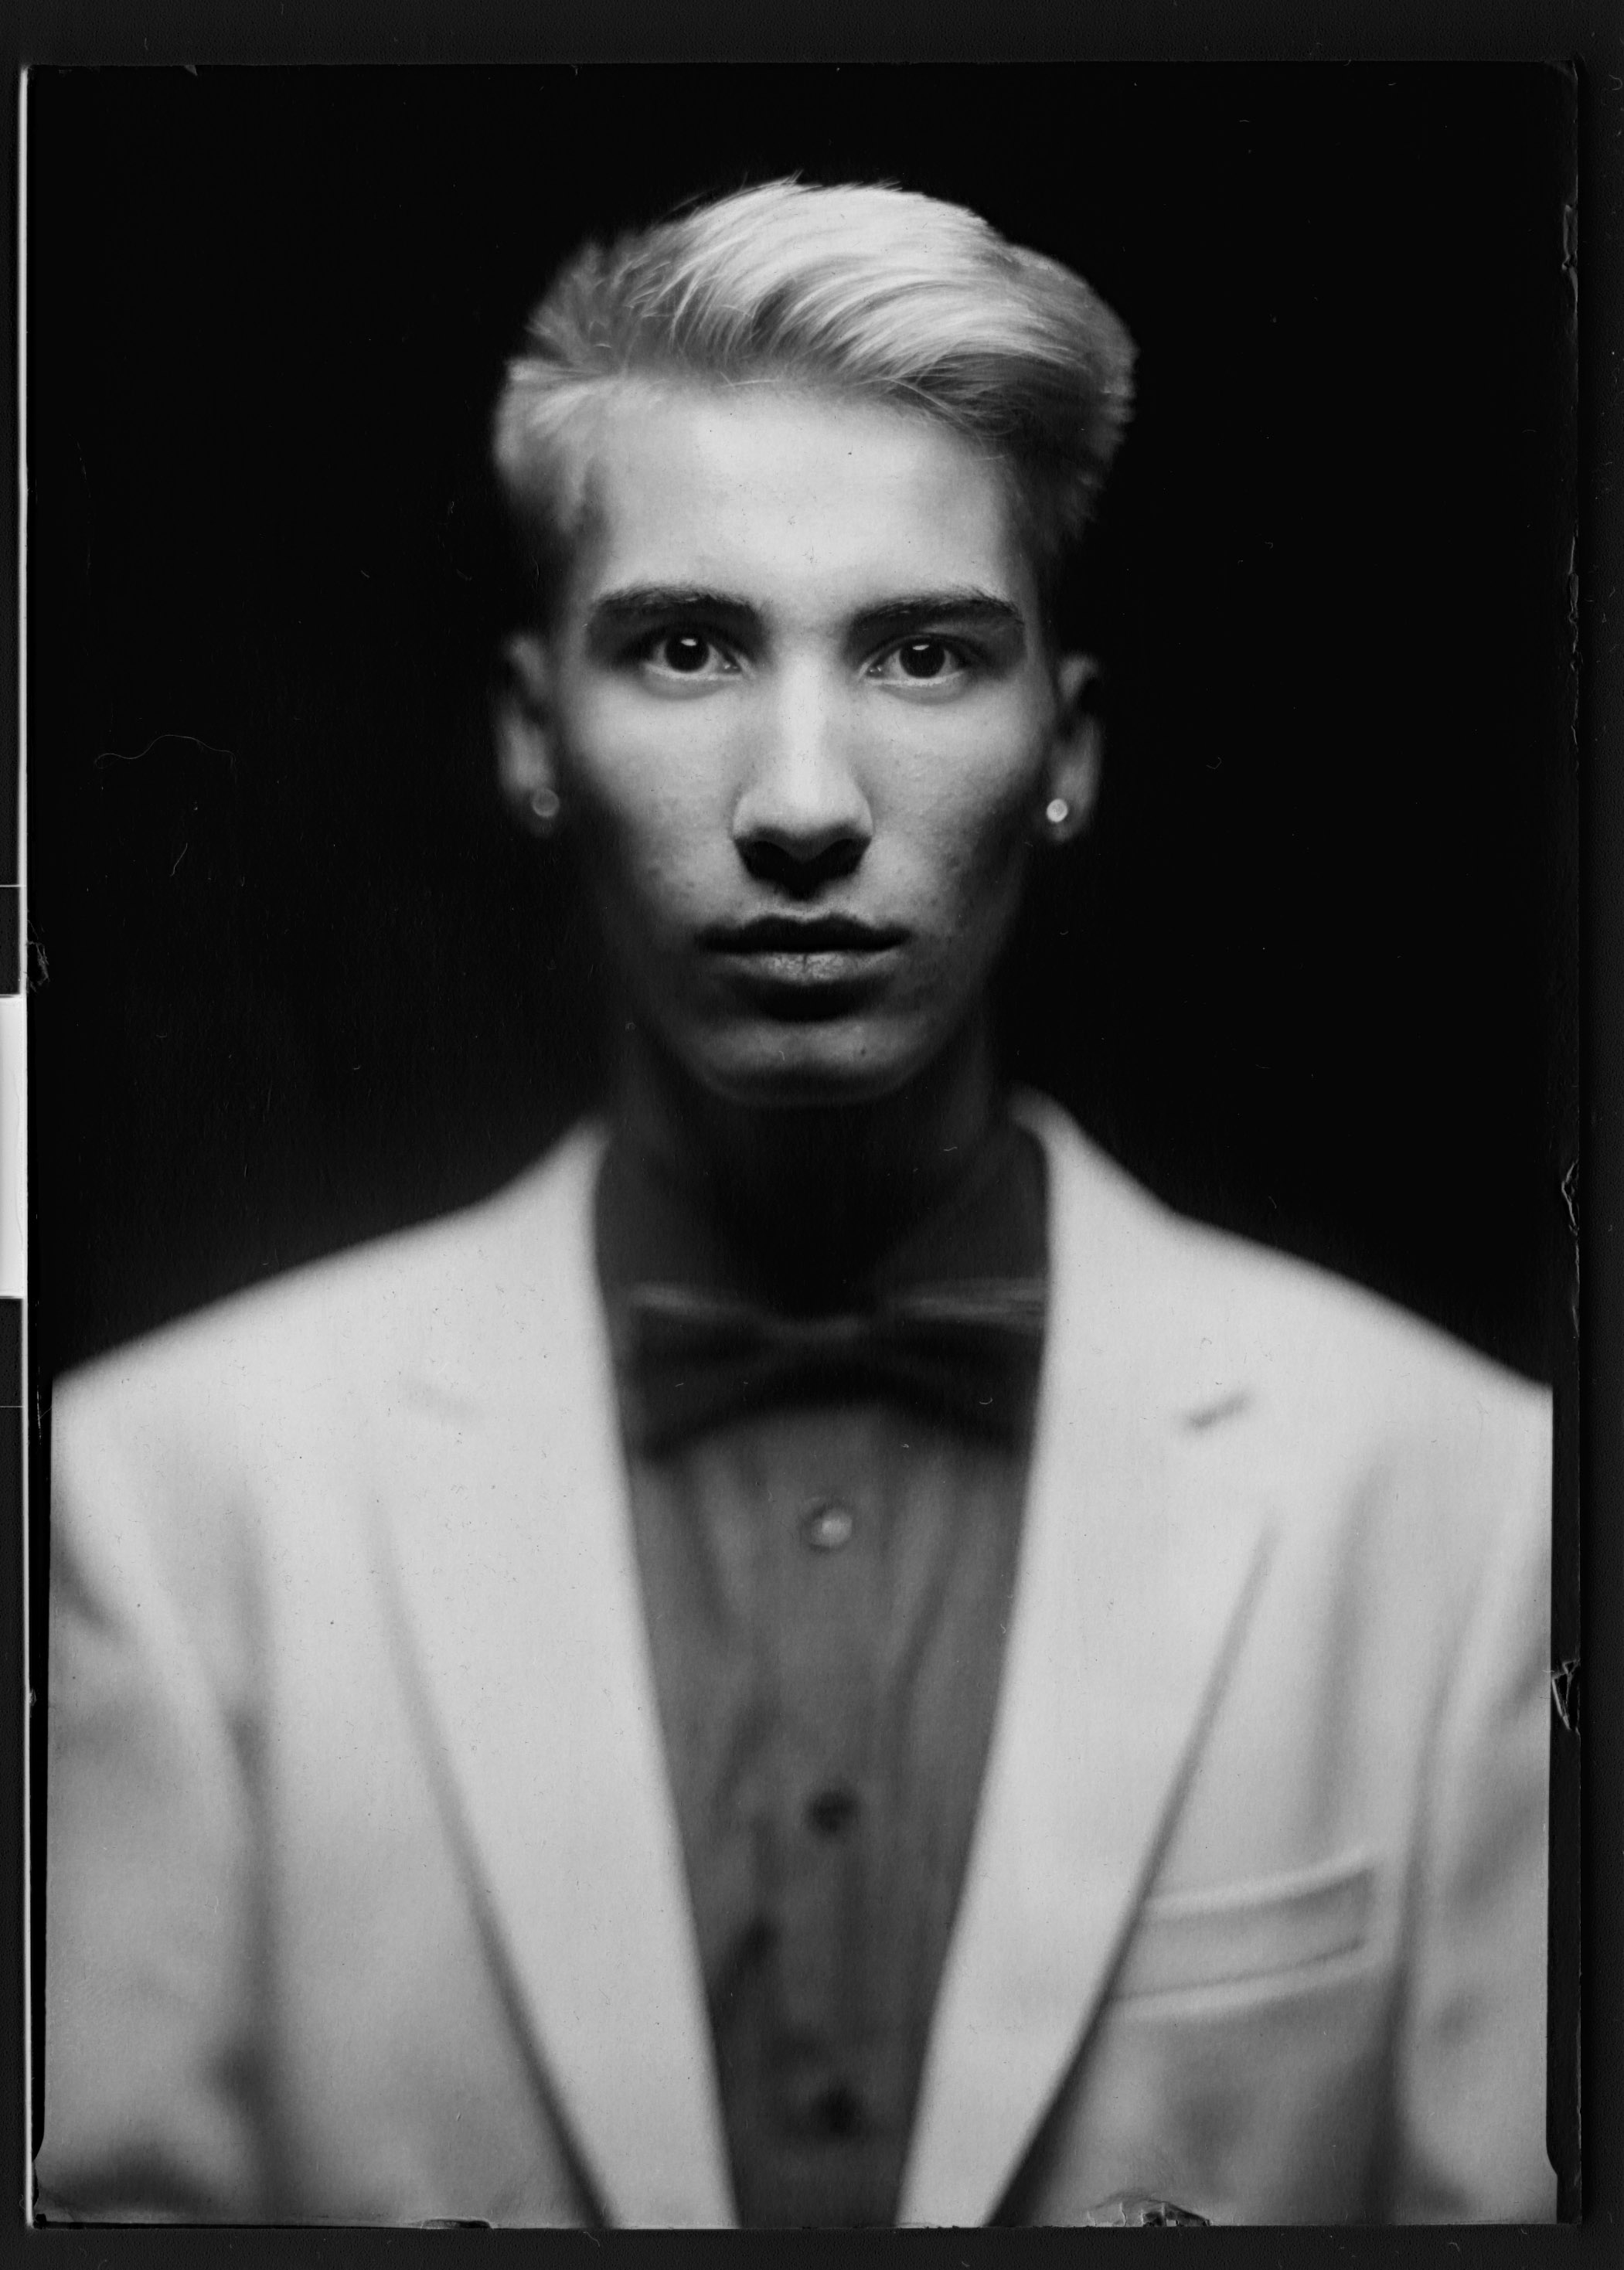
The key to large format photography is ... the size of the photosensitive material. Large format includes shooting on the surface larger than 6x9, and basically on a larger format than the film negative used for prefessional medium format cameras. Of course, there are also models of specialized cameras using a lens with a large format coverage for photographing panoramas on a 6x17cm negative (eg Fuji G617) but it is still the medium format area. The maximum area that I was able to use for scanning is 21.5 by 24 centimeters, so it is a true large format. In mix with the Tessar 250mm F3.5 lens, it gives you a viewing angle equivalent to a 35mm lens for cameras equipped with a full frame sensor like Canon 5D, Sony A7 or classic 35mm (36x24mm) film negative. By converting the depth of field of lens it is aperture equivalent of F0.5, even slightly less, which is unbelievable. Why is this parameter so amazing? Because lenses that you are usualliy in contact with are not even close. For example, a portrait / standard 50mm prime lens with 1.8 diaphgram, gives us very large possibilities for separating photo plans. This effect is particularly liked in portrait photography, called bokeh by photographers. If we have a camera with smaller sensor than the "Full Frame" one, the lens diaphragm and focal length should be multiplied by sensor crop factor (for Canon 1.6x or 1.3x, for Olympus 2x and Nikon, Sony, or Pentax 1.5x), which gives us for example on Sony camera 75mm and F2.5 respectively. F1.4 or 1.2 class lenses can be more expensive from lenses 1.8, sometimes even 10-20 times, you can see what is all about. The following photo was made on photographic paper (paper sensitivity is about 3 ISO) with dimensions 13x18cm where the previously mentioned Tessar becomes a 45mm lens and apture of F0.7. The photo was taken about 10 seconds after I set the focus, hence the model has slightly moved:
Of course, there are optically and mechanically complicated tilt / shift lenses for many full-frame or even medium-format cameras, but here we have the advantage directly from the design of the camera.
EXPOSURE TIME
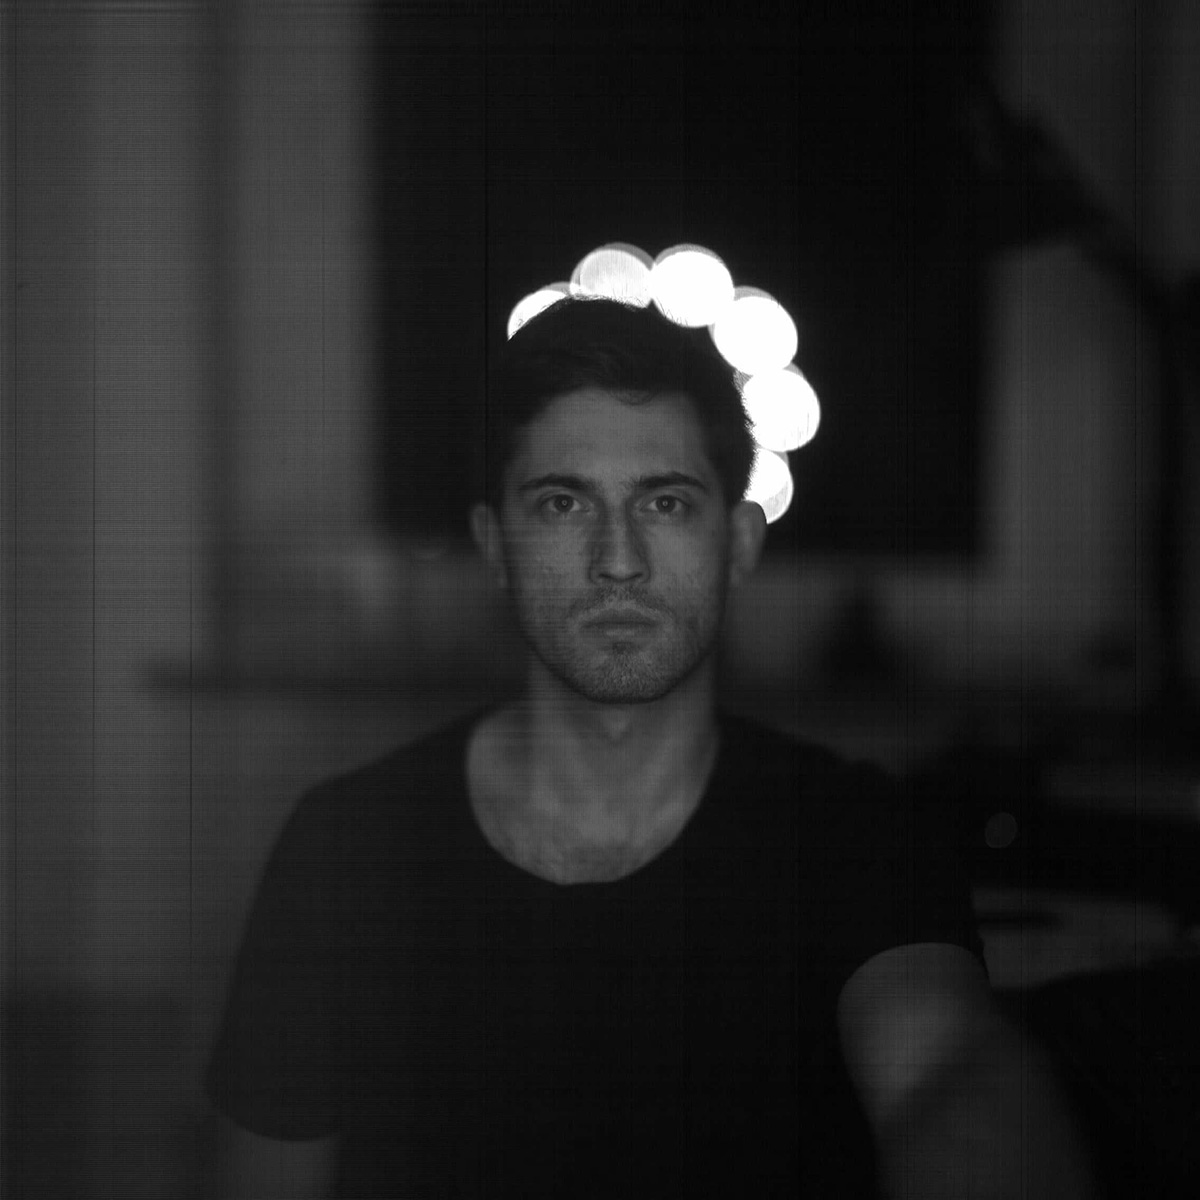
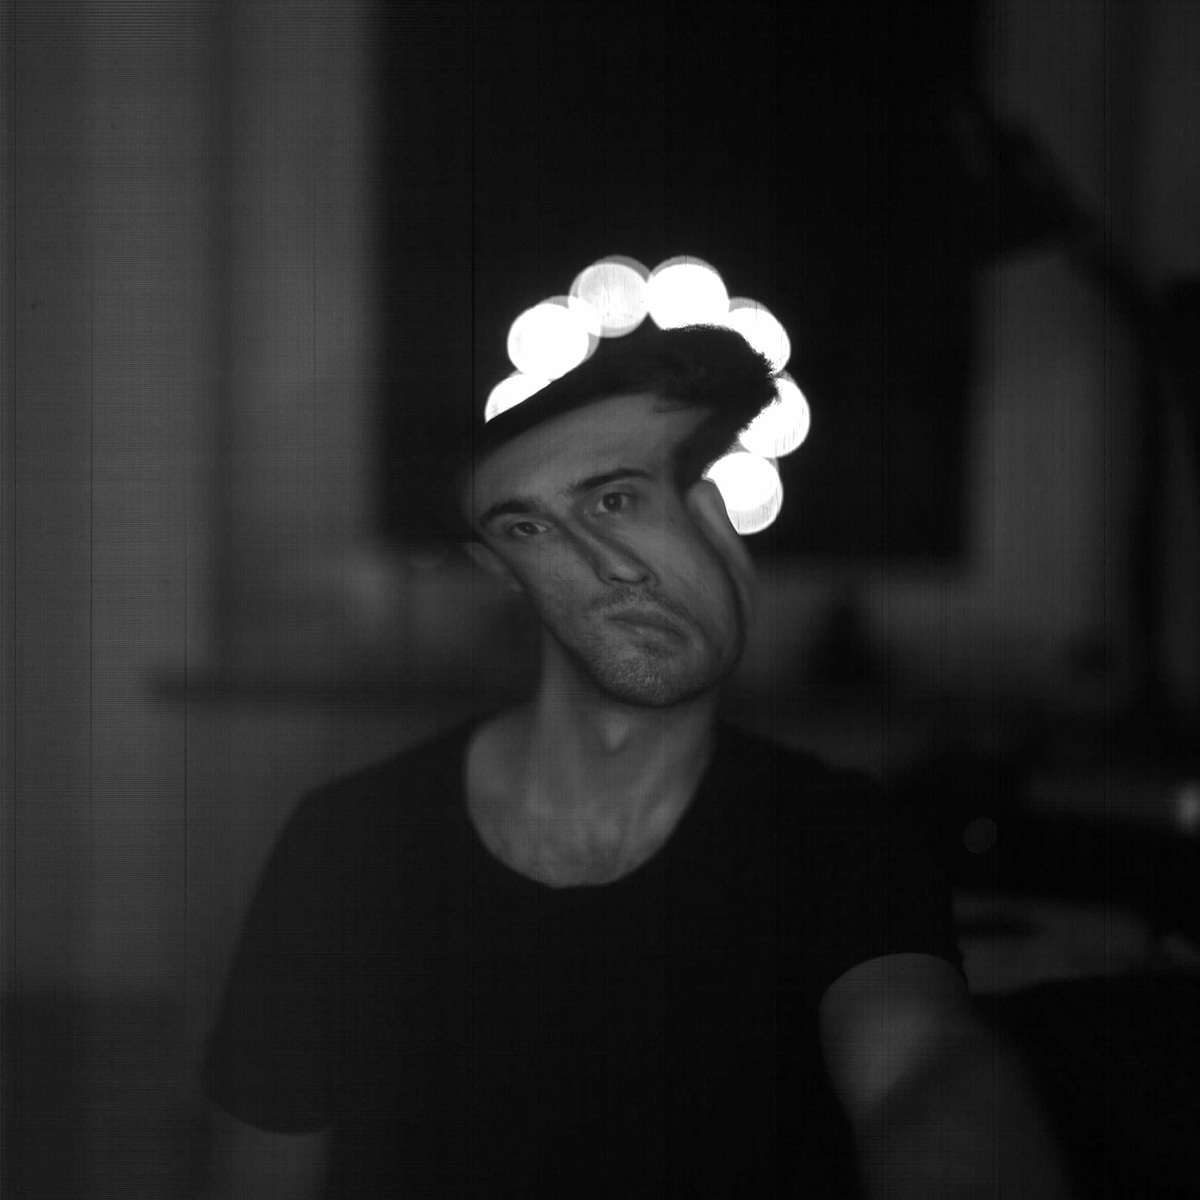
Every photosensitive material needs a certain amount of photons to create the final image. Negatives and sensors are collecting photons at a specific time and depending on how long these photons reach it, the picture will be lighter or darker, while objects that reflect light stronger will be brighter than those less reflective ones. If we do not have enough light to properly expose the photo, we need to extend the time of falling in, so we risk of blur if this photo by shaking our hand or photo object move. The scanner sensor works on the same principle, with the difference that it is able to catch in short time only a strip having in height one pixel and 21.5 centimeters in width. It is a very sensitive sensor, because its surface by counting the number of pixels is huge, but unfortunately to get a full picture we have to move it over the entire surface of the image that we want to capture. In this way the picture is not exposed to the blur, but at the same time it is sensitive to movement of the objects in the frame (photography without a tripod is almost impossible, and certainly not feasible with this particular technique). Below you can see photos taken with a modified computer scanner using the Mentor Panorama camera for focusing - I sat motionless on the first one, while on the other I moved while taking a picture:
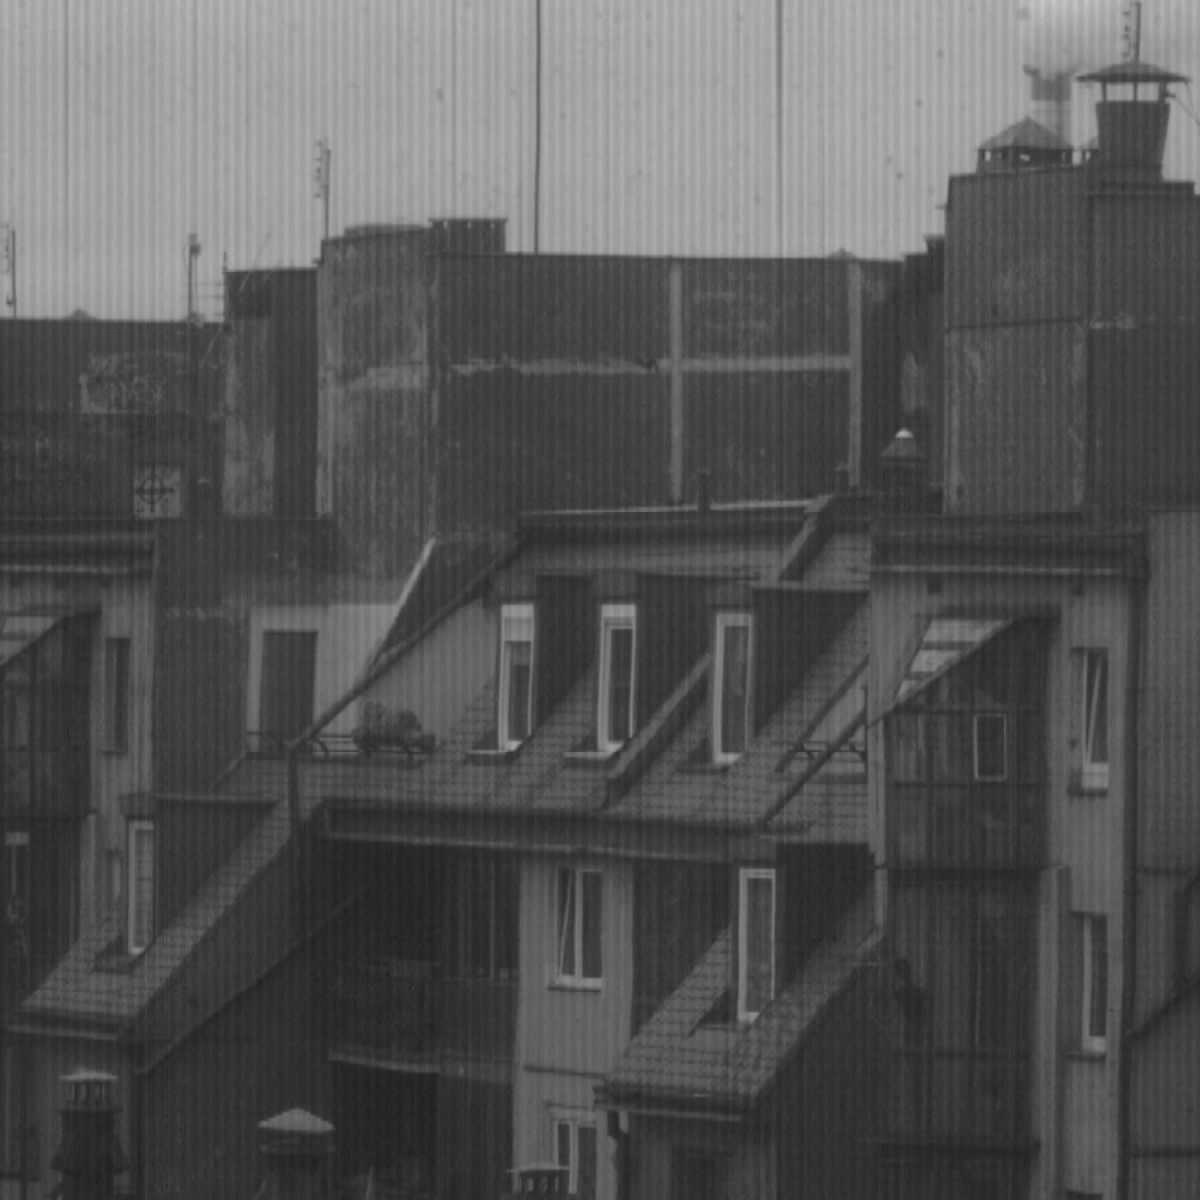
In classical photography, we have several options of manipulation to choose a photographed exposure - in other words, the "Holy Trinity": Aperture, Time and Sensivity, and by the artificial light of source. In case of the scanner, we can only choose aptures and a light source, but as the sun can not be regulated like a lighting bulb in studio, only the apture remains. I scanned the following two photos during the day with aperture as closed as it was possible - F32. As you can see, although the sensor is designed for other purposes, it allows to take pictures without visible over exposures. The lens itself is a curiosity - Zeiss Tessar is a very well-known design, although the F3.5 apture in large format cameras was very rare, especially in such big ones. An additional curiosity is the fact that the lens has a central shutter, allowing to take pictures at a speed of 1/30 second and longer - T (it stay open untill you press shutter button again) and B (as long as you hold down shutter button it is gathering the light). Unfortunately it doesn't have a flash synchronization slot, which I regret very much, because it would be very useful when photographing on photographic paper or negatives in a studio.

The scanner, when used as a photo sensor, is catching light only in black and white, but as handheld one or a table scanner it has all colors. Why? In photo cameras, sensor consists of light-sensitive diodes, which is similar to scanner. The difference is fact that camera sensors have filters of green, red and blue, which separates colors. Then the computer blends the surrounding pixels to obtain correct color (close to the reality) for each point of the image. Of course, there are also Foveon camera matrices used by the manufacturer of lenses and cameras - Sigma, which uses layered technology. These sensors are checking the entire spectrum for each pixel separately without the need for interpolation. In CSI type scanners, the CSI sensor consists of one pixel layer that lacks of any primary color filter. So how does the scanner knows particular colors of details of a scanned page? The answer is surprising - it is in the source of the scanner's light, which flashes respectively in red, green and blue. The light reflects from different colors returns to sensor, then electronics compares the color from surrounding pixels which are moving under sheet of paper. This process creates 3 images - 1 for each RGB channel and blend them together. As a result, each pixel has color information. In case of using such scanner to capture continuous light, which does not change the color, we get a monochromatic image with a slight green color cast. Congratulations reading through this article, below I will be updating with my most interesting Scannerographies :) Andrzej - OTHER ARTICLES -
 Youtube
 Facebook
 Instagram
 Linkedin